Sour Power: How Small-Batch, Fermented Foods Allure and Nourish
Sour Power: How Small-Batch, Fermented Foods Allure and Nourish

A somatic psychotherapist by day, Laura generally brews her kombucha at night, and loves it when she can get her kids involved. Being a therapist and longtime vegan, Laura understands the importance of gut health, and fermented tea is easy to make and enjoy with family.
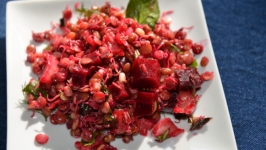
After a warm greeting from black Labs Bubby and 3-month puppy Boomer, Laura led me into her kitchen so we could get started. First she gave me a taste of the fresh-pressed grape juice she had prepared with her kids. Given the season, the vines on the Poppinks’ Old Hawk Hill vineyard at their Woodside home were dripping with red Meritage grapes, so Laura and her son Cal (9) picked a big bowl full and then sister JoJo (7) blended the grapes and smashed them through a strainer straight into a jar. This was set aside to become the “taste” ingredient in our finished kombucha. (For a different batch, we also used fresh apples that were shared with us by the nonprofit organization Village Harvest).
Next, we talked about the SCOBY, short for “symbiotic colony of bacteria and yeast.” The name might be a little hard to wrap your head around, but essentially, this is responsible for brewing the fermented goodness that is kombucha. Laura learned her recipe (and got her SCOBY) from another local friend and master gardener, Kathleen Putnam. (See Kathleen’s recipe below.) So that was the first thing I learned: Get your SCOBY from a friend! Or, you can go online to SF based Reddit and connect with someone local who has SCOBY to give.
In a nutshell, when you add SCOBY to tea (most commonly black tea, but green can also be used) and sugar, the bacteria and yeast eat the sugar, causing fermentation and brewing a bubbly, effervescent fermented tea that tastes yummy and is known to be great for your gut and help with digestion, detox, energy, weight management, immunity and disease prevention.
How to make your own kombucha
Sanitize everything you’re using by coating it in distilled white vinegar. Sanitation is key.
Boil ½ gallon of water. Once water reaches boiling point, remove it from the heat and add tea bags (or loose-leaf tea) to steep for 15 minutes.
Remove the tea bags (or strain the loose-leaf tea) and add the cane sugar while water is still hot; stir well to dissolve the sugar.
Add the remaining half-gallon of water to help cool the hot tea. (Laura boils the whole gallon of water and lets the tea cool overnight).
Once the tea has cooled to room temperature (cooler than 80° range), transfer the tea to the large glass jug and add the SCOBY. Always wash your hands when dealing with the SCOBY. If you got your SCOBY from a friend then you have your starter tea, but if this is your first time making kombucha and you bought your SCOBY, add the 1 cup white vinegar or store-bought plain kombucha.
Cover the top of the jug with cheesecloth and secure it with a rubber band so that the kombucha can continually breathe.
Stick the thermometer on the outside of the jug, and place the jug in a closet or other dark place that stays relatively warm and is not disturbed by people and light.
Allow kombucha to brew for 8–12 days (the longer it brews, the stronger it is).
Continually check the temperature. It needs to stay in the 70° to 80° range for best results. If it falls below 70°, it will take longer for the kombucha to brew. If the kombucha reaches above 85° temperature, you run the risk of growing mold on your SCOBY. If you see any green or black mold, discard the SCOBY and the whole batch of kombucha.
When your kombucha is ready and you like the taste, remove the cheesecloth.
You will notice your SCOBY is bigger—it will grow to the width of the container it’s in and a second SCOBY will form. SCOBYs will always continue to grow. Once a SCOBY gets to be a couple of inches thick, you need to peel off the bottom slice(s) in order to keep it healthy. You can give these slices to your friends to start their own batch, or compost them.
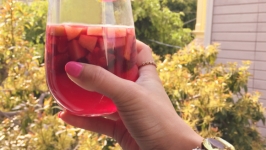
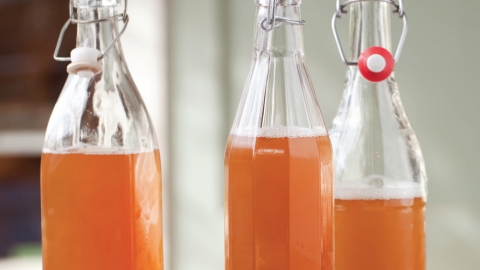
Now it’s time to bottle your kombucha: Add the juice to your glass bottles—Laura and I added the fresh grape juice—and ladle the kombucha from the jug into the bottles using a funnel, until it reaches about an inch from the top. Seal the bottles well.
Leave the SCOBY in the jug with enough kombucha to barely cover it (or, if you want to clean the jug, remove the SCOBY and place it in another sanitized container while you sanitize the jug). The jug does not need to be sanitized between batches unless your SCOBY becomes unhealthy. Cover the container with cheesecloth. The SCOBY is fine to sit like this until you make another batch—just make sure you check the SCOBY before starting another batch. If you are pausing for a longer time, keep the SCOBY with its starter tea in the refrigerator.
Now you have a choice to make: If you would like, you can simply refrigerate your bottled kombucha and be done with the process, or you can leave the bottles of kombucha at room temperature in a dark place for another 1–3 days, which will initiate a secondary fermentation process. During this process, the cultures eat the sugar you just added (fructose from the juice) and continue to ferment. This makes the kombucha fizzy and a little stronger.
If you put the kombucha through a second fermentation, more sediment (and likely a hunk of SCOBY) will grow inside of the bottles. It is advised to strain the kombucha to avoid a mouthful of SCOBY, which has an undesirable texture.
Place the bottles of kombucha in the refrigerator and voila, enjoy having the fresh and healthy brew at your disposal as a way to get probiotics.
In this season of celebration, it can also be enjoyed as a mixer with your favorite spirit. We like to call that “mombucha.”
Copyright ©2025 Edible Silicon Valley. All rights reserved