Increase Your Yields With Sheet Mulch
Pulling weeds may currently occupy many of the precious free hours of your time. Watching a crab grass penetrate the root crown of a freshly planted baby basil plant can be irksome. Incessantly, we pull out unwanted plants only to disturb the soil, thereby creating the very conditions that allow them to outcompete our cultivated seedlings. Between lawn mowing and weed pulling, our nation seriously mismanages our time and labor. How can we overcome this ferris wheel of weeding? If this interests you, read on.
Feed Your Soil
The soil is very much alive. The microbes that convert latent nutrients into accessible nutrition for your plants are working night and day below the surface. By providing the right conditions, we can foster that microbial growth by 1) prolonging the wet period of the soil, 2) reducing weed penetration and 3) slow releasing nutrients. All three of these benefits can be achieved through sheet mulching.
Many permaculture blogs will claim that one can simply slap sheet mulch atop a former lawn and this will magically transform the “Rhizosphere”, or root zone into a fertile food growing zone. In my experience transforming over fifty lawns into productive and diverse gardens, this is NOT the case. The first step is to properly remove the lawn’s root zone. This can best be done the old fashion way with elbow grease. On a broader scale, this can be done initially with a rototiller. The lawn’s aggressive roots must be removed prior to sheet mulching, so as to start with a clean palate and give your young plants the best chance to thrive .
Innoculate the Soil
Once the land has been prepped, rake the soil into level. Then is the opportunity to broadcast innoculants and soil conditioners. I prefer to utilize the Down to Earth product, BioLive. This product comes laden with Endo-mycorrhizae and trace minerals which will work under the sheet mulch when wetted to begin to foster microbial life immediately. I also like to utilize a light broadcast of bone meal, kelp meal and volcanic rock ash for this purpose as well, depending on soil needs. To find out what your soil may need, it can be worth investing in a soil test. For around $70 you can get a thorough lab analysis. I like wallace labs, which can be done in a one week turnaround (WLabs.com). For those of you who wish to stay “in-house” with your amendments, simply spread one inch of home-made, finished compost under your sheet mulch.
Cardboard Layer
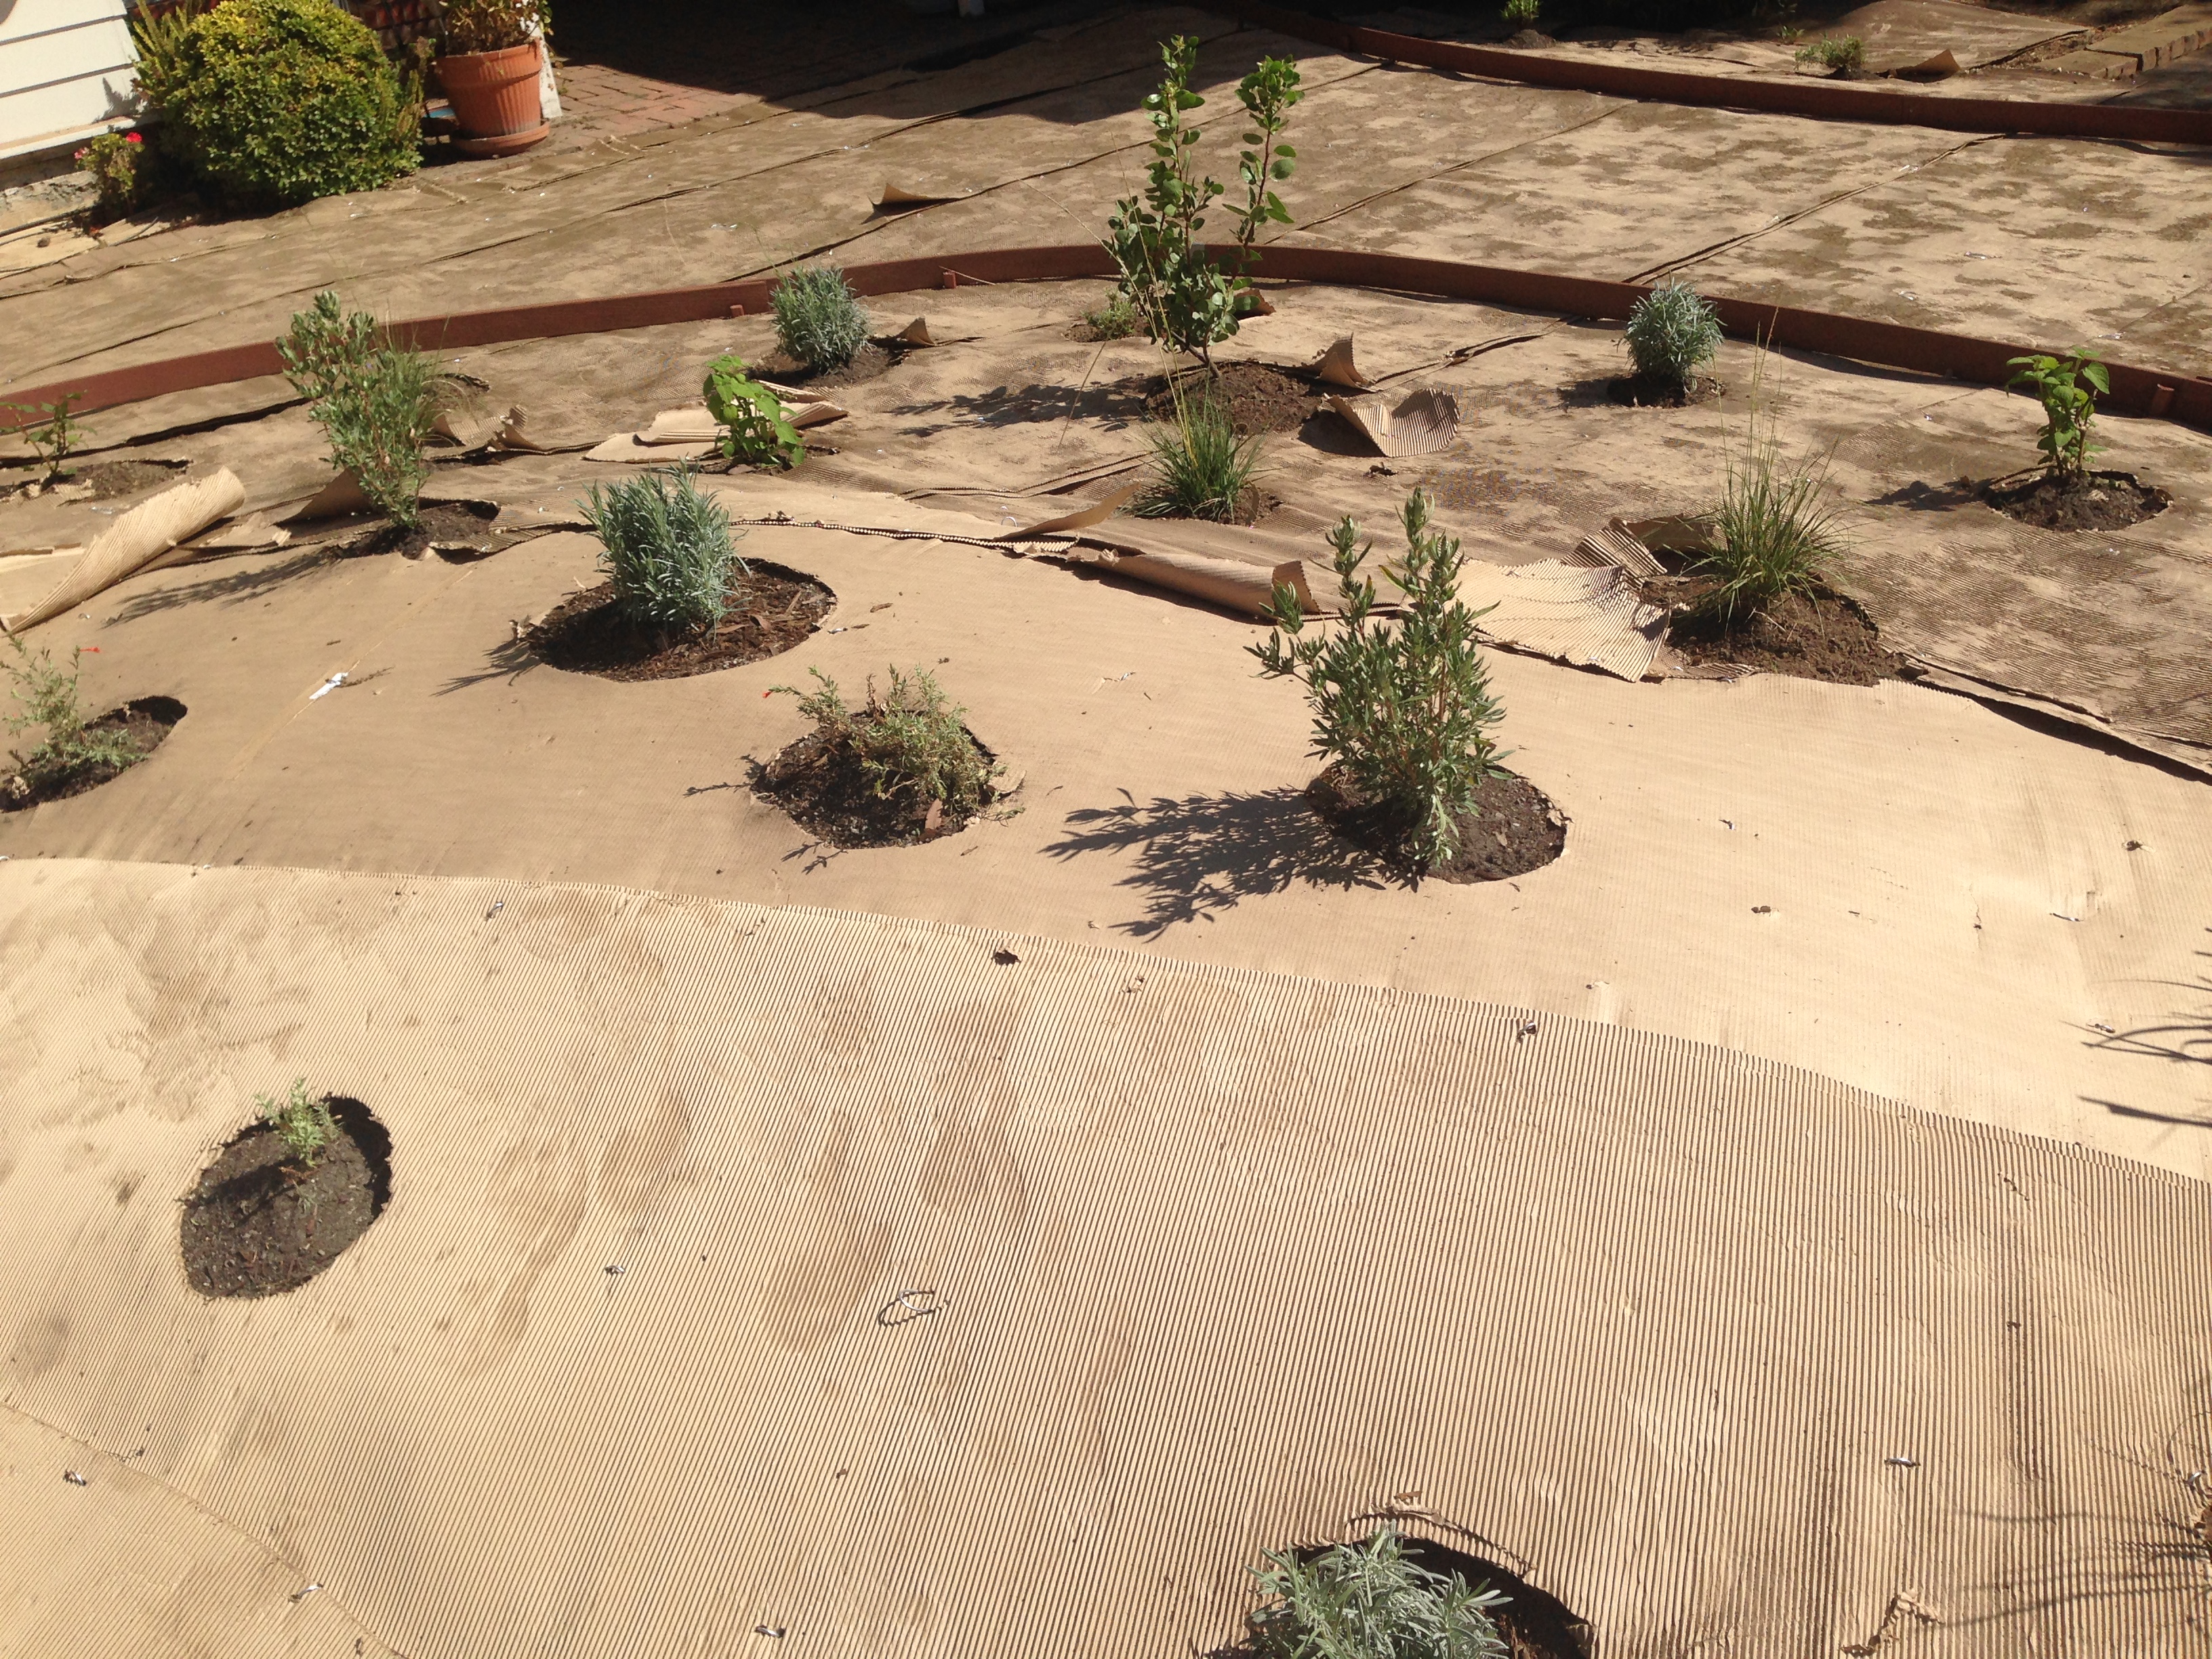
Now that you have removed the lawn’s roots and broadcasted your innoculants, you are ready to sheet mulch. In large installs, I utilize commercial cardboard rolls. This post-consumer recycled product can easily be rolled out like carpet and tacked down with 1/2” irrigation stakes. I find this to be much faster to cover a work area. For those of you DIY’ers, you can collect large cardboard from bike shops and appliance stores. Simply break them down flat and stake all corners. Note: Be sure to overlap the edges, as seams are where the weeds will attempt to sprout. It is important to plant closely following the card boarding, as the cardboard is susceptible to tearing if moistened without the protective cover of mulch. If you are planting directly into the newly card boarded area, cut a large circle out of the cardboard with a box cutter and dig your hole. I like to amend each hole with ~50% native soil, ~40 % planting mix, 5% compost and 5% worm castings.
Mulch
Once your plants are planted, follow up with wood chip mulch. I recommend 3-4 inches of mulch, being sure to not bury the root crown of each plant, as this is a common way that leads to rot and disease. The mulch will act as a sealant as moisture enters the rhizosphere. The sheet mulch with also slow release nutrients during each watering. For shorter-lived annuals, I recommend mulching with coco coir. This organic matter’s small particles break down much faster than wood chips. While my broccoli grows for example, the coco mulch shields the roots from the hot sun. After I am finished harvesting my broccoli, I turn this coco coir mulch into the soil. This helps build tilth, as the coco is fluffy and becomes quickly inoculated with microbes.
Leave Some Areas Bare for Native Bees
As the sheet mulch will drastically reduce weed sprouting, I recommend raking out one meter circles that are left bare. Into these circles I seed wildflower mixes, such as California Poppy eschscholzia californica, Lupine lupinus albifrons, and Yarrow achillea millefolium. These bare zones can foster native insectories, in the form of pollen as well as leaving some ground bare for ground nesting native bees. For more information on ground nesting bee habitat, check out this website; Xerces.org/enhancing-habitat-for-native-bees/.
With sheet mulching, you do more of the hard work upfront to create ideal conditions. While this makes the start-up more arduous, you will rest assured that the bulk of your ongoing garden maintenance will go towards the planting and harvesting of your food crops, not toward Saturdays of weed pulling and lawn mowing. Give sheet mulching a try and see if it helps your garden yields while freeing up time for increased garden capacity.